Collars can make absolutely anything look kawaii or lolita as cutiepiemarzia on youtube proves #obssessedwithcollars lol. Even if you don't have clothing with collars they're really easy to make an there are loads of different ones that you can make.
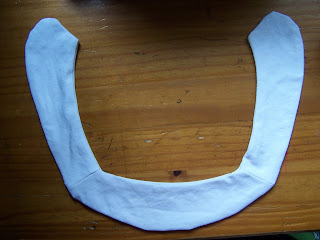
I'm gonna show you how to make a simple classic lolita collar, here's how mine looks.
What you will need:
- A fabric of your choice - I used white cotton (The lighter the weight of the fabric the better).
- Scissors.
- Pins.
- Paper and pencil.
- Needle and thread if you make it by hand, But I used a sewing machine for most of it because it's quicker and neater.
- The item of clothing that you want to attach it to, I attached mine to a cardigan but you can add them to shirts, dresses etc.
First choose the item of clothing, light pastel colours are best.
Then put a piece of paper on the inside of the clothing, line up one of the sides with the shoulder seam as shown.
Using the sketch draw a collar shape, refer to your item of clothing if you're not sure how big to make it. It should fit on your clothing like this, you can see how it will look when you make the rest of the shape. If it doesn't fit properly remake it.
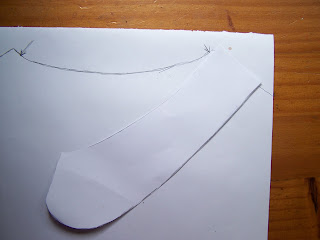
Now place a piece of A4 paper under your item of clothing and outline the back of the neck. The line should go from one shoulder seam to the other as shown by the arrows.
Cut out collar part B.
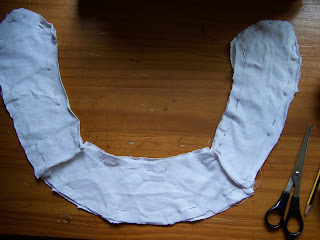
Place the collar templates on the fabric you chose for your collar, trace the outline of the templates on the paper. You should trace part A four times, twice the right way round and twice in reverse. Trace part B twice, you should end up with six pieces altogether.
Cut all the pieces out.
Sew them together to make one collar piece (you an do this step by hand).
Sew the collar onto the neck if the clothing, I did this by hand so that I could hide the stitching (sew a small a ladder stitch, mine sewed under a few millimeters of each fabric with every stitch).
And that's how you do it, :) here are some pics of collars in fairy kei fashion if you want inspiration for styling yours.
 |
| This one is one of my favorites, it's how I would style mine. Thinking about making a scalloped collar like this one too :) |
 |
| This style is more lolita, I love the lace collar. It creates a simple elegant look. |
 |
| This collar is similar to mine, I love the top in this one soo much. |
For a more specifically lolita look decorate with cute buttons, pastel colored ribbons or lace trim. Have fun making your wardrobe kawaii! :3


No comments:
Post a Comment