YayBlogger.com
BLOGGER TEMPLATES
Showing posts with label sew. Show all posts

Saturday, 22 February 2014

This is how I did it! - DIY bear bag

Bear bags are like a must have accessory, but you don't really see them in shops and they can be a tad too expensive for me. So I thought I make one myself or two :)


Front


The back - the tail is attached to the zip.


Bear bags are so awesome, they're really cute and pretty easy to make. Here's one I made from a small bear, it doesn't hold much because it's so small. The strap on it goes over your shoulder and it's just basically for things like your phone or purse.

If you want to make one like this here is a tutorial you can use: http://egl.livejournal.com/11582191.html#cutid1 I didn't use this tutorial but it's very similar to the technique I used.


And unfortunately I didn't take photos whilst making it. So I made a another bear bag, a bear backpack!
And I'm gonna show you how to do it =D

This is what you will need:

  • A bear
  • lining fabric
  • Scissors
  • Pins
  • Sewing machine
  • needle and thread
  • zip
  • leather for the straps


Cut a hole in the bag of the bear that is less than the length of the zip, take the stuffing out of the torso of the bear but leave the stuffing in the limbs and head (also leave some in the torso so that when you put things inside the back the shape won't change). 


 Fold the lining in half and sew two edges together leaving a gap at the top that is as long as the hole in the bear's back.


 Place the lining into the hole so that the nice side of the lining fabric is on the inside.


  Sew the bottom of the zip into the base of the hole this should be near the tail.


Line up the zip (wrong side out), the edge of the hole and the lining as shown.

  Sew along the zip/edge of hole to attach the zip to the bear and also the lining.


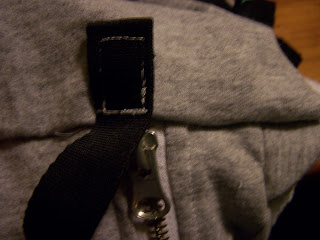
Then sew on the straps to the middle/back of the head and the top of the legs.

Hope you found this helpful stay tuned for more DIYs and fashion posts (≧◡≦)


Monday, 21 October 2013

Heart elbow patch DIY

The other day I saw someone with elbow patches on their jumper and I was instantly inspired to make some kawaii ones for myself, So here's a tutorial. It's really easy to make and doesn't take much time, the finished thing looks pretty cute too :3


What you will need:
  • The jumper that you want to decorate.
  • Some fabric in your chosen colour - this is for the patch, colours that go well are pink/blue, yellow/purple etc. If you're going for a fairy kei kind of look be sure to use pastel colours.
  • A5 paper.
  • Pencil.
  • Scissors.
  • Pin.
  • Thread that matches the colour of the patch and an iron not pictured because I forgot :/


Start by folding the paper in half horizontally.


Draw half a heart shape on one side of the fold if you want you can just find a pic of a heart online and print it out.


Fold the page and cut out the shape.


So you should have a heart shape like this.


Trace around the heart onto the back of the fabric you want for your patch do this twice, one for each sleeve.


Cut around the line, leave about 1-2cm for seam allowance.


Cut notches on the edge of the fabric where there are curves and corners as shown.


Iron the seam allowance down onto the wrong side of the fabric.


When you turn it around it should look like this, as you can see the edges are not smooth but you can fix this when you sew it on.


Repeat with the other heart.


Put the jumper on and put a pin through the sleeve in the centre of your elbow, but be careful!


Place the heart on the sleeve, use the pin to help you place it.


Now you can pin it and sew it on if the edges of yours are like mine you can edit it when sewing by stretching out the sides a little when you stitch. Make small stitches over the edge of the fabric, about 4mm apart.


Repeat with the other sleeve. But this time rather than using a pin to find where the centre of your elbow is, you can trace several points from the first sleeve onto the other to make it symmetrical.


And that's it! I hope you enjoyed this tutorial and have a go yourself :)

Monday, 26 August 2013

Tutorial haul =)

Today I went hunting for a whole load of tutorials that I plan to use, so I thought I'd share them with you guys :)  The links will take you to sites that have other tutorials on them aswell so why not check them out.


This one isn't a tutorial but you can get an idea of how to make it by looking, for more pics click the link.

http://kate-showandtell.blogspot.com.br/2011/11/bloom-sewing-machine-mat-finished.html


So basically you can use all these tutorials and make adjustments like colour/fabric choice to make it more kawaii. When I come across more tutorials I'll be adding them so check back for more :) I hope this was useful and have fun making!

---
Here are some more tutorials that I found since I posted this entry:


Hand held mirror decoden


http://thegluegungirl.blogspot.co.uk/2012/03/diy-decoden-sweet-jar-tutorial.html


http://www.craftster.org/forum/index.php?topic=250285.msg2784681#msg2784681


http://magicpearlheart.blogspot.co.uk/2012/07/diy-candy-jewelry-tutorial.html


Friday, 2 August 2013

DIY Totoro bag Part 2


Hi there, here's the second part to my Totoro bag tutorial. If you haven't seen the first part then click here to go to it. In this part I'll show you how to construct the outer part and the ears and arms, at this point the lining of your bag should have been made.


This is how your bag should look so far.


Pin along the bottom of the ears and the arms, make sure that the right sides of the fabric are facing inwards.


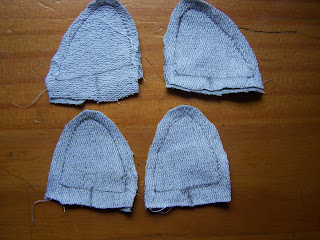
Sew the shapes but leave the bottom open, after I sewed mine I cut seam smaller (so that it was about 5mm) and then I made marks on the bottom as you can see so that I wouldn't sew them the wrong way round or something.


Turn the pieces inside out.


Going back to the main piece, pin the top of front of the bag (and the ears/arms, the ears and arms should be on the inside) to the side piece that has the zip on it.


Check whilst you still have the pins in that the bag looks like this when you turn it inside out.


This pic is of the bag turned inside out after I sewed it (that's the next step obvs - you have to sew).


This pic is just to show you how the top looks like with the front sewn on.


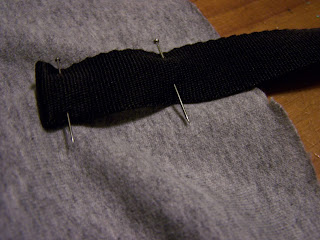
The next thing I did was pin the bag strap onto the side that doesn't have the zip on it.


And again more sewing.


Next thing I did was sew the edges of the sides together (these are the smaller egdes I'm talking about).


This pic shows what it will look like when you turn the sides inside out.


Here's anotherpic of thesame thing cuz the last one was a bit crappy : /


Now pin and sew the bottom side to the bottom of the front. At this point I realised that the bag was floppy and needed some support, so I went hunting for this to use. Cardboard wouldn't work although I had quite a bit of that, I tried wire but it wouldn't make the exact shape I wanted and I didn't want the things I put in the bag to bulge through the front so...


I found another old backpack that I was already using for spare bits and found more of this plastic board stuff I'd used before for my fairy kei bag, I still don't know what it is most likely a type of polystyrene.


At the front I inserted it in between the front inside and the lining, I used 9 small stitches around the edges of the front (looks like Totoro has dimples now lol, It's more noticeable in the pictures. But the reason why I sewed it on instead of glueing it is because glue ruins fabric, and it might disolve if you wash it).


When I added the padding to the back of the bag I sewed two arrow pointing up, it helps to keep the foam stuff in place.


Nearly done! =) turn the bag inside out (so that the outside of the bag is inside, it will need turning again later. Don't forget to put the strap on the inside).


Pin the back of the bag to the sides and sew it, leave a gap atthe bottom for turning it.


Turn it inside out so that it's the right way round, sew the gap at the bottom closed, I used my sewing machine to close the back so there's a line of stitches running along the bottom.


So this is what the finished thing turned out to be like, I'm quite happy with the result. Here's a pic of the back of the bag after I finished sewing it up, the bottom where I closed the seam is a bit rough. But I'd been working on this for so long and I was in a rush so I just finished it like that. If you wanna make yours neater just hand sew a ladder stitch to close it :)


Phew, that was a lot of work. I'm so happy to finally have this up I've been working on it for days I hope it was useful to you :) Have fun making your own!