Hi there, here's the second part to my Totoro bag tutorial. If you haven't seen the first part then click here to go to it. In this part I'll show you how to construct the outer part and the ears and arms, at this point the lining of your bag should have been made.
This is how your bag should look so far.
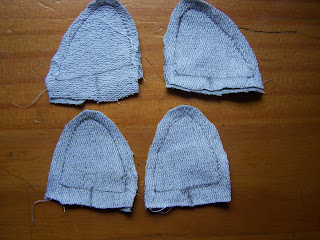
Pin along the bottom of the ears and the arms, make sure that the right sides of the fabric are facing inwards.
Sew the shapes but leave the bottom open, after I sewed mine I cut seam smaller (so that it was about 5mm) and then I made marks on the bottom as you can see so that I wouldn't sew them the wrong way round or something.
Turn the pieces inside out.
Going back to the main piece, pin the top of front of the bag (and the ears/arms, the ears and arms should be on the inside) to the side piece that has the zip on it.
Check whilst you still have the pins in that the bag looks like this when you turn it inside out.
This pic is of the bag turned inside out after I sewed it (that's the next step obvs - you have to sew).
This pic is just to show you how the top looks like with the front sewn on.
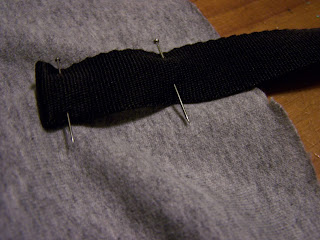
The next thing I did was pin the bag strap onto the side that doesn't have the zip on it.
And again more sewing.
Next thing I did was sew the edges of the sides together (these are the smaller egdes I'm talking about).
This pic shows what it will look like when you turn the sides inside out.
Here's anotherpic of thesame thing cuz the last one was a bit crappy : /
Now pin and sew the bottom side to the bottom of the front. At this point I realised that the bag was floppy and needed some support, so I went hunting for this to use. Cardboard wouldn't work although I had quite a bit of that, I tried wire but it wouldn't make the exact shape I wanted and I didn't want the things I put in the bag to bulge through the front so...
I found another old backpack that I was already using for spare bits and found more of this plastic board stuff I'd used before for my fairy kei bag, I still don't know what it is most likely a type of polystyrene.
At the front I inserted it in between the front inside and the lining, I used 9 small stitches around the edges of the front (looks like Totoro has dimples now lol, It's more noticeable in the pictures. But the reason why I sewed it on instead of glueing it is because glue ruins fabric, and it might disolve if you wash it).
When I added the padding to the back of the bag I sewed two arrow pointing up, it helps to keep the foam stuff in place.
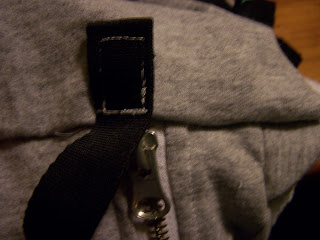
Nearly done! =) turn the bag inside out (so that the outside of the bag is inside, it will need turning again later. Don't forget to put the strap on the inside).
Pin the back of the bag to the sides and sew it, leave a gap atthe bottom for turning it.
Turn it inside out so that it's the right way round, sew the gap at the bottom closed, I used my sewing machine to close the back so there's a line of stitches running along the bottom.
So this is what the finished thing turned out to be like, I'm quite happy with the result. Here's a pic of the back of the bag after I finished sewing it up, the bottom where I closed the seam is a bit rough. But I'd been working on this for so long and I was in a rush so I just finished it like that. If you wanna make yours neater just hand sew a ladder stitch to close it :)
Phew, that was a lot of work. I'm so happy to finally have this up I've been working on it for days I hope it was useful to you :) Have fun making your own!


No comments:
Post a Comment